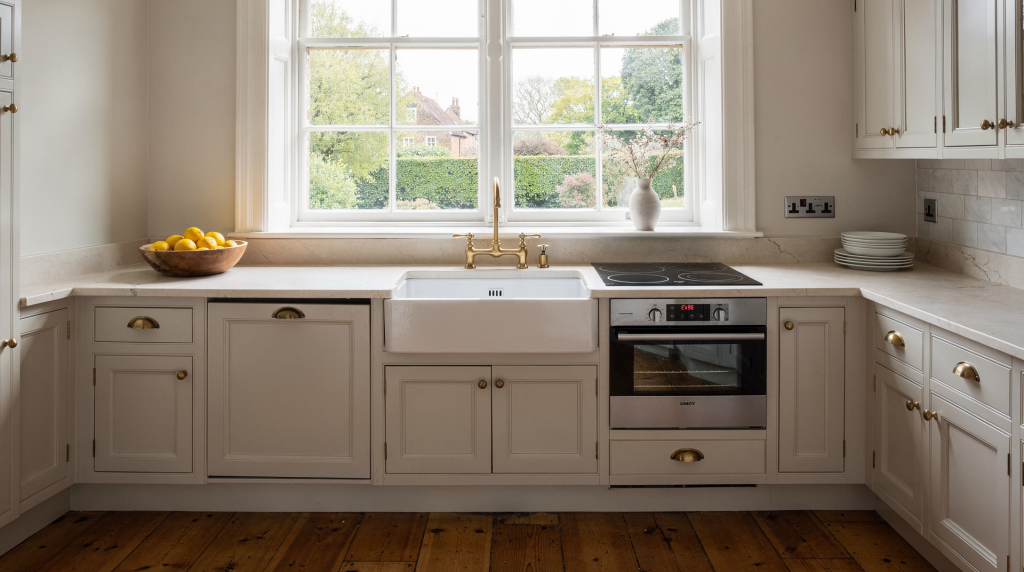
A historically sensitive kitchen upgrade is not about freezing a house in the past. It is about making the kitchen work for modern life without flattening the character that makes the building worth keeping. The best results come from a clear plan: protect the features that define the house, modernize the systems that keep it safe, and make new choices that look like they belong.
Start with the house, not the finishes
Before choosing cabinets or tile, identify what the kitchen is actually contributing to the historic character of the house. In many old homes, that includes room proportions, original millwork, floor materials, windows, door openings, and any surviving built-ins. The National Park Service advises avoiding the removal of historic materials and distinctive spatial relationships, and replacing only when deterioration makes it necessary.
Ask these questions first
- What is original to the house?
- What is a later alteration that may not need to be preserved?
- What features are visible from adjacent rooms and shape the character of the interior?
- What parts are failing for practical or safety reasons?
- Is the property in a historic district or subject to local review?
That last question matters more than many owners expect. Local rules can affect permits, materials, exterior changes, window work, and structural modifications. Even when the kitchen itself is interior, moving a window, changing an opening, or adding an addition can trigger review.
Build a practical preservation hierarchy
Not every old thing deserves equal treatment. A useful rule is simple: keep what carries character, upgrade what carries water, power, heat, and daily use.
| Priority level | What usually belongs here | Typical approach |
|---|---|---|
| Highest | Original trim, doors, stair details, windows, built-ins, floorboards, plaster details | Repair first, replace only if beyond repair |
| Medium | Cabinet layouts, counters, finishes, lighting, ventilation, storage | Redesign carefully to fit the house |
| Lowest | Tired 1970s-1990s updates, damaged particleboard, mismatched later additions | Remove or replace with better-fitting solutions |
This hierarchy keeps the project focused. It prevents a common mistake: spending heavily to preserve weak later alterations while damaging the original fabric that actually gives the home value.
Decide what to restore, repair, or replace
A kitchen upgrade in an old house usually includes three types of work:
1. Restore what can be saved
Restore features that are structurally sound and visually important.
Examples:
- Refurbish original cabinets instead of replacing them
- Refinish hardwood floors rather than installing new ones
- Repair plaster and trim profiles
- Rework original doors and hardware
2. Repair when the material still has life
Repair is the middle ground. If a feature is worn but not failing, targeted repairs often preserve more of the house than replacement.
Examples:
- Patch local water damage in a wood window
- Replace only failed cabinet parts
- Consolidate or splice damaged trim
- Repoint or repair small areas of masonry near kitchen additions
3. Replace only when necessary
Replacement is appropriate when a feature is too deteriorated to repair, unsafe, or functionally unworkable. When replacement is necessary, match the original design, color, texture, and, where possible, materials. Avoid “almost historic” substitutes that look generic or create a false sense of age.
Plan the kitchen around the existing structure
The smartest historic kitchen projects work with the house’s bones, not against them. That usually means respecting the existing footprint, wall locations, ceiling heights, window positions, and circulation patterns.
Why this matters
Old houses often have irregular framing, non-standard dimensions, and structural limits that are invisible until demolition starts. Forcing a modern open plan into a historic structure can mean losing plaster, trim, and floor transitions that cannot be replaced convincingly. It also creates expensive complications with load-bearing walls, utilities, and finishes.
Better planning questions
- Can the kitchen function within the existing footprint?
- Is there a pantry, rear hall, or adjacent room that can absorb part of the function?
- Would a small, carefully designed addition be less destructive than major interior demolition?
- Can appliances be rearranged to improve workflow without moving major walls?
In many older homes, the answer is yes. A smaller footprint with a better layout often works better than a larger room that has been stripped of its character.
Choose modern upgrades that disappear into the architecture
A historically sensitive kitchen does not reject modern convenience. It hides it intelligently.
High-value upgrades that usually make sense
- Exterior-vented range hood sized correctly for the cooking equipment
- Modern electrical service and grounded circuits
- Updated plumbing and shutoff valves
- Proper insulation where it can be added without damaging historic fabric
- Safe, code-compliant lighting
- Moisture control and ventilation
Limited and sensitive upgrading of mechanical, electrical, and plumbing systems is considered appropriate in historic properties when it supports continued use.
Good concealment strategies
- Use panel-ready appliances where the cabinet layout can absorb them
- Place the refrigerator where it visually recedes
- Run ventilation and wiring with minimal visible impact
- Keep outlets, switches, and controls aligned with trim and cabinet rhythms
- Use integrated storage to reduce countertop clutter
The goal is not to make the kitchen look fake-period. It is to let the room feel coherent.
Match the new work to the old house
New cabinets, counters, and fixtures should echo the house’s proportions and materials, not copy a theme loosely.
A useful rule
If the house has simple trim and restrained detailing, do not install ornate cabinetry. If the house has heavier millwork and strong vertical proportions, flat frameless cabinets may feel out of place unless handled with care.
What to match
- Cabinet proportions
- Door and drawer profiles
- Hardware finish
- Trim depth and line
- Floor color and grain
- Counter edge detail
- Faucet and lighting style
What to avoid
- Overly literal “period” replicas that feel theatrical
- Trend-driven finishes that clash with the rest of the home
- Materials that imitate old surfaces poorly
- Cabinet details copied from a different era or building type
A kitchen in a 1910s house should not look like a 2020s showroom, but it also should not pretend to be a museum set.
Understand the biggest mistakes before you start
The most expensive errors usually happen early.
Common mistakes
- Demolishing before documenting the room
- Assuming every old element must be preserved
- Replacing original windows because they are drafty instead of repairing them
- Ignoring ventilation and moisture control
- Choosing cabinets before confirming measurements and clearances
- Removing walls without checking structure
- Installing “historic-looking” parts that don’t match the house
- Treating code upgrades as separate from preservation goals
The safest approach is to document the room carefully before any work begins. Photograph every wall, opening, built-in, threshold, and detail. Measure twice. Note where materials change. Record what appears original and what looks later.
Step-by-step planning process
Step 1: Document the existing kitchen
- Photograph all walls and ceilings
- Measure room dimensions and openings
- Note original materials and later additions
- Identify damage, movement, rot, and moisture issues
- Record plumbing, electrical, and HVAC locations
Step 2: Research the house
- Determine approximate construction date
- Study architectural style and common kitchen layouts for the period
- Check whether the home is in a historic district
- Review local permit and review requirements
Step 3: Set preservation priorities
- List what must stay
- List what can be repaired
- List what can be replaced
- Identify what can be improved invisibly
Step 4: Design the functional layout
- Plan work triangle or work zones
- Confirm appliance dimensions
- Protect windows, trim, and circulation where possible
- Keep the layout inside the existing structure if feasible
Step 5: Specify materials and finishes
- Choose finishes that belong to the house
- Match new trim and cabinetry to surrounding rooms
- Select durable, maintainable surfaces
- Keep the palette restrained if the architecture is already rich
Step 6: Sequence the work
- First: structure, moisture, electrical, plumbing, ventilation
- Second: walls, floors, insulation, repair work
- Third: cabinets, counters, fixtures, finishes
- Last: hardware, paint, final adjustments
Budget where it counts
Owners often overspend on visible finishes and underfund the hidden work. In historic kitchens, that is backward.
Put money into
- Structural repairs
- Electrical and plumbing upgrades
- Ventilation
- Moisture management
- Skilled repair labor
- Custom solutions where dimensions are irregular
Save money on
- Overly elaborate decorative features
- Trend-based finishes that will age quickly
- Full replacement where repair is possible
- Generic luxury upgrades that do not improve function
A careful repair to original materials often provides more value than a full cosmetic overhaul.
A simple decision checklist
Use this before approving any item for demolition or replacement.
- Is it original to the house?
- Does it contribute to the character of the room?
- Can it be repaired?
- Will replacement damage surrounding historic fabric?
- Does the new work match the house’s scale and proportions?
- Will the change improve daily use without creating visual noise?
- Are permits or historic review required?
If the answer to the first three questions is yes, slow down before removing anything.
When to bring in specialists
Some projects are worth professional help from the start.
Call in expertise when
- Walls may be load-bearing
- There is active water damage or rot
- You suspect hidden structural issues
- The house is formally designated or regulated
- The kitchen needs custom cabinetry to fit irregular openings
- Historic finishes need conservation rather than simple repair
A contractor familiar with older buildings is not optional in many cases. Historic houses rarely behave like new construction, and kitchen work often exposes problems hidden for decades.
FAQ
Can you modernize a historic kitchen without losing character?
Yes. The key is to preserve the defining features of the room while upgrading systems, storage, and appliances in ways that fit the architecture.
Should you keep the original kitchen layout?
If the layout still functions, keeping the footprint is often the least destructive option. If it does not work, change it carefully and avoid unnecessary wall removal.
Are new cabinets acceptable in a historic house?
Yes, if they are sized and detailed to suit the building. Custom or semi-custom cabinets often work better than stock units in older homes with irregular dimensions.
Is it always better to restore original windows?
Not always, but repair is usually preferable to replacement when the windows are still repairable. Loss of historic windows can erase a major part of the house’s character.
Do interior kitchen changes need historic approval?
Sometimes. Interior work may be exempt in some places, but if it affects the exterior, structure, or designated features, review may still apply.
Final takeaway
A historically sensitive kitchen upgrade succeeds when it respects the building’s proportions, materials, and story while making the room safer and easier to use. Start with documentation, protect what is original, modernize the systems that matter, and let every new choice serve the house instead of competing with it.