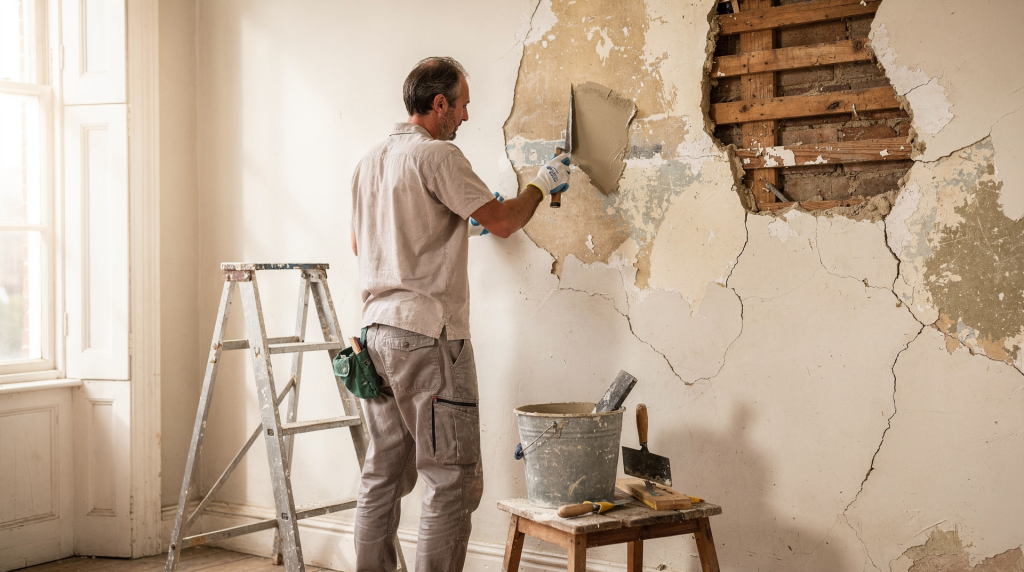
After fifteen years of walking through old houses, I’ve learned that plaster tells the truth about a building if you know how to listen. A crack running diagonally from a window corner isn’t just a crack — it’s a record of how the framing settled in 1923. A hollow patch above the baseboard might trace back to a plumbing leak from the Eisenhower administration. The material itself is remarkably resilient. Traditional lime-and-sand plaster, reinforced with horsehair or straw, can outlast several generations of occupants. But when it does fail, the failure usually has a story behind it. The challenge is reading that story correctly before you pick up a trowel.
Why historic plaster fails
Before touching a trowel, find out why the plaster is damaged. In most old houses, the plaster itself is not the root problem. Water intrusion, building movement, failed lath attachment, vibration, or previous hard repairs are usually the real cause.
I’ve inspected walls where someone patched the same crack four times over a decade, each repair failing within two seasons. The problem wasn’t the patching technique — it was a downspout dumping water against the foundation, causing subtle seasonal movement in the sill plate. No amount of filler solves that.
Common failure patterns include:
- Hairline cracks from normal seasonal movement — wood framing expands and contracts with humidity, and plaster, being rigid, responds by cracking along predictable lines
- Wider cracks from framing movement or settlement — these often trace structural shifts, sometimes decades old, sometimes still active
- Bulging or hollow-sounding areas where plaster has separated from the lath — the keys that once gripped through the lath gaps have broken off
- Soft, stained, or crumbling plaster from leaks or condensation — water is the most efficient solvent for gypsum-based plasters
- Patches that keep cracking because the substrate was not prepared correctly — dust, old paint, or loose material left behind guarantees a weak bond
- Decorative surfaces damaged by over-sanding or modern fillers — I’ve seen Victorian cornices flattened by an overzealous palm sander in twenty minutes
A useful rule: repair the cause first, then the plaster. Otherwise, the same crack returns. This isn’t philosophical advice — it’s practical economics. Plaster repair is labor-intensive, and doing it twice because you skipped the investigation phase is expensive in both time and material.
Know what kind of plaster you have
Historic walls were often built with multiple coats on wood lath, though some later homes used metal lath or veneer plaster systems. Traditional historic plaster usually contains lime and/or gypsum with sand and fiber reinforcement such as horsehair.
That matters because the repair material must behave similarly to the original. A very hard, rigid patch on a softer historic wall often creates a new crack at the edges. I’ve seen this happen with Portland cement-based patches applied to lime plaster — the differential movement between the two materials practically guarantees a perimeter crack within the first year. The original wall moves with temperature and moisture cycles; the patch refuses to budge. Something has to give, and it’s usually the bond line.
Quick identification checklist
- Tap the surface gently: hollow spots may mean loss of key behind the lath — the sound changes from a solid thud to something closer to a drum
- Look at the crack edges: crumbly edges suggest active deterioration, not just a cosmetic line — if the plaster is turning to sand at the edges, you’re dealing with ongoing degradation, probably moisture-related
- Check the substrate if there is exposed damage: wood lath, metal lath, masonry, or drywall backing — each requires a different preparation and material choice
- Note the finish: smooth skim coat, textured finish, or decorative molding all need different approaches — a sanded finish from 1890 won’t match a smooth trowel application from 1950
First decision: repair, stabilize, or replace?
Not every damaged area needs to be removed. This is where I see homeowners and even some contractors make the most expensive mistakes. A wall with scattered hollow spots but intact surface plaster is often a candidate for reattachment, not demolition. The original material carries information — about the building’s construction, about the craftsmen who applied it, about the materials available at the time. Replacing it with modern drywall erases that record.
| Condition | Best approach | Notes |
|---|---|---|
| Fine hairline crack | Clean and fill | Usually a cosmetic repair if stable |
| Crack that reopens seasonally | Flexible repair and monitor | Check for movement or moisture first |
| Loose but intact plaster | Reattach to lath | Often salvageable with plaster washers or adhesive methods |
| Small hole with sound edges | Patch in place | Prepare edges carefully |
| Large area with severe deterioration | Partial replacement | Match thickness, finish, and materials |
| Repeated water damage | Fix source first, then patch | Repair without moisture control will fail |
If the wall is bulging, shifting, or shedding large sections, do not assume it is a simple patch job. Structural movement or hidden water may require a more detailed assessment. I once encountered a parlor wall that appeared to have minor cracking — until we opened a small inspection hole and found that the sill beneath it had been reduced to powder by carpenter ants. The plaster was merely the messenger.
Tools and materials that actually help
For many repairs, you do not need exotic products. What matters is compatibility and careful preparation. The tools I reach for most often are the same ones plasterers used a century ago, with a few modern additions that genuinely improve outcomes.
Common tools
- Utility knife or crack widener
- Stiff brush and vacuum
- Scraper or putty knife
- Plaster washers or repair screws
- Drill and bits
- Margin trowel and taping knife
- Spray bottle or sponge for light dampening
- Mixing bucket
- Sandpaper only for very light cleanup, not heavy shaping
Useful materials
- Compatible plaster patching compound
- Basecoat plaster for deeper repairs
- Finish plaster or skim coat material
- Plaster washers and corrosion-resistant screws
- Fiberglass mesh for select repairs
- Bonding agent only when appropriate
- Primer before paint
Avoid overreliance on all-purpose spackle for historic plaster. It may work on tiny cosmetic defects, but it is usually too weak or too different in texture for meaningful restoration. Spackle is essentially a lightweight filler designed for modern drywall — it lacks the compressive strength and vapor permeability of traditional plaster materials. Using it in a historic wall is like patching a wool coat with polyester fleece. It might fill the hole, but it won’t behave the same way over time.
Step-by-step: repairing small cracks
Small cracks are the easiest repair, but they still need proper preparation. The difference between a repair that lasts twenty years and one that fails in two seasons often comes down to the first five minutes of prep work.
1. Inspect the crack
Check whether the crack is stable, seasonal, or actively widening. Mark the ends of the crack with pencil and date it if you plan to monitor it. I keep a small notebook for this — a quick sketch with measurements and a date tells you in six months whether the crack is growing.
2. Open the crack slightly
Use a utility knife or crack widener to create a narrow V-shaped opening. This gives the patch something to grip instead of sitting on the surface. A surface-level fill over a hairline crack has almost no mechanical bond — it’s relying entirely on adhesion to the paint layer, which is why it flakes out so predictably.
3. Clean out dust and loose material
Brush and vacuum the crack thoroughly. Any dust left inside weakens the bond. I use a stiff artist’s brush for narrow cracks — it reaches deeper than a standard paintbrush.
4. Dampen the edges lightly
If the surrounding plaster is very dry and porous, lightly dampen the edges so the new material does not dry too fast. Historic plaster can be remarkably thirsty, and if it pulls the moisture out of your patch too quickly, the repair material won’t cure properly.
5. Fill with compatible repair material
Work the compound into the crack in thin applications rather than trying to fill it all at once. A deep fill in one pass tends to shrink and crack as it cures. Two or three thin passes, each allowed to set before the next, produce a denser, more stable repair.
6. Smooth and blend
Feather the edges so the repair disappears into the surrounding wall. Do not over-sand historic plaster. The original surface often has a compressed, burnished quality from decades of troweling and painting that sanding destroys instantly.
7. Prime and paint
Once fully cured, prime the repair before painting. Unprimed patches will flash through the finish paint differently than the surrounding wall, creating a visible halo around every repair.
Step-by-step: repairing loose plaster that is still salvageable
If the plaster is bulging or sounds hollow but is still largely intact, it may be possible to reattach it. This is one of the most satisfying repairs in historic preservation — taking a wall that seemed destined for the dumpster and restoring its structural integrity without losing the original material.
1. Map the loose area
Tap the wall to find the edges of separation. A hollow sound often marks the loose section. I use my knuckles for a first pass, then a rubber mallet for more precise mapping. The transition from solid to hollow is usually quite distinct once you train your ear to it.
2. Drill small pilot holes
Place holes strategically where the plaster can be drawn back to the lath without breaking the surface. Space them about six to eight inches apart across the hollow area. The goal is to create enough attachment points to hold the plaster firmly without creating so many holes that you weaken the surface.
3. Reattach the plaster
Use plaster washers and screws or another suitable stabilization method to pull the plaster snugly back against the lath or substrate. The washers distribute the clamping force across a wider area, preventing the screw head from pulling through the plaster. Tighten gradually — you want the plaster to make contact with the lath, not to crush it.
4. Fill the holes
Patch the screw heads and any pilot holes with a compatible setting material. These small fills should sit slightly below the surface to allow for a skim coat over the top.
5. Skim the area if needed
A thin skim coat can hide the repair and restore a flat surface. This is where the artistry comes in — matching the plane and texture of the surrounding wall so that the repair becomes invisible.
This is often the best solution when the plaster is separated but not shattered. If the lath is rotten or the plaster has lost its structural key, reattachment alone will not hold. The keys — the small tabs of plaster that squeezed through the lath gaps during original application — are what hold the plaster to the wall. If they’ve crumbled away across a large area, there’s nothing for the washers to pull against.
Step-by-step: patching larger holes
Larger repairs fail when the edges are not prepared correctly. The new patch needs a sound perimeter. I’ve seen beautifully executed patches that failed within months because the surrounding plaster was deteriorating at the bond line.
1. Remove only unsound material
Cut back to firm plaster. Do not leave crumbly edges. Test the perimeter by pressing with a finger or tool — if it flexes or crumbles, keep cutting back until you reach solid material.
2. Expose and clean the substrate
Remove dust, loose plaster, and debris from the lath or backing. Wood lath should be clean and sound. If individual lath strips are broken or rotted, replace them before patching.
3. Stabilize the surrounding area
If the neighboring plaster is loose, secure it before patching. A new patch anchored to unstable surrounding plaster will simply transfer the failure to the perimeter.
4. Build the patch in layers
Apply a basecoat first, then a finish coat once the base has set. Traditional three-coat plaster work followed this same logic: a scratch coat for mechanical bond, a brown coat for leveling, and a finish coat for the surface. Your patch should follow the same principle, even if you’re using modern materials.
5. Match thickness and profile
The repair should sit flush with the wall and follow the original plane. Historic walls are rarely perfectly flat — they have subtle undulations from the lath and the hand-troweling process. A dead-flat patch in the middle of a gently waving wall will catch light differently and announce itself from across the room.
6. Recreate texture if needed
Use the surrounding wall as your reference. Do not leave a flat repair in the middle of a textured surface. Study the original finish carefully — was it troweled smooth, floated with a sand finish, or textured with a sponge or brush? Match the technique, not just the material.
When to use mesh, washers, or adhesive
Different failures call for different solutions. Choosing the right stabilization method is as important as choosing the right patching material.
- Use plaster washers when the plaster has separated from the lath but remains mostly intact — this is a mechanical reattachment that preserves the original material
- Use mesh reinforcement for selected patch repairs where extra tensile support is helpful — particularly across joints between old and new plaster, or over areas where the lath has minor gaps
- Use adhesive stabilization only when it is compatible with the historic material and the wall conditions — injection adhesives can re-bond delaminated plaster in situations where mechanical fasteners would cause too much damage
- Use basecoat and finish coat plaster when the opening is large enough that a simple filler will not perform well — deep fills need the structural properties of a proper basecoat
Do not apply mesh as a universal fix. In historic work, overusing mesh can create a repair that is too rigid or too thick. The mesh itself has a thickness, and if it’s applied over the entire repair area rather than just at the joints, it can create a raised patch that’s impossible to hide. I reserve mesh for bridging transitions between materials or reinforcing areas subject to minor movement.
Common mistakes to avoid
Historic plaster repairs often fail for predictable reasons. After fifteen years of inspecting failed repairs, I can list the usual suspects with some confidence.
- Filling cracks without finding the cause — the repair industry’s most common and most expensive oversight
- Patching over dust, paint flakes, or loose material — the bond is only as strong as the surface it’s applied to
- Using modern joint compound for every repair — it’s designed for thin applications over drywall, not for structural plaster repair
- Over-sanding and flattening the surrounding historic surface — you’re removing the original finish and creating a depression that will always be visible
- Making the patch harder than the original wall — differential movement guarantees perimeter cracking
- Ignoring water stains, leaks, or humidity problems — moisture is the enemy of every plaster repair
- Leaving the repair proud of the surface — a raised patch catches light and shadow differently
- Repainting before the patch has fully cured — trapped moisture leads to adhesion failure and efflorescence
If a patch keeps cracking, the problem is usually not the patch itself. It is movement, moisture, or a bad substrate. Step back and diagnose before you patch again.
How to handle moisture problems
Moisture is one of the fastest ways to destroy historic plaster. Staining, softening, and crumbling usually point to a leak above, a plumbing issue, or repeated condensation. The water itself does the damage, but the secondary effects — mold, efflorescence, freeze-thaw cycling in exterior walls — can accelerate deterioration dramatically.
Before repairing:
- Fix roof, gutter, and flashing problems — water travels down through a building in ways that can be surprisingly indirect; a stain on a first-floor ceiling might originate from a roof leak two stories up
- Repair plumbing leaks — even slow drips inside walls can saturate plaster over months or years
- Check exterior walls for water entry — failed mortar joints, cracked siding, and improper flashing are common entry points
- Improve ventilation where condensation is recurring — bathrooms and kitchens in old houses were often designed with more natural ventilation than we provide today
- Allow the wall to dry fully before patching — this can take weeks for a thoroughly saturated wall; use a moisture meter to confirm, not just a visual inspection
Never seal over damp plaster and hope for the best. That traps the problem in the wall. I’ve opened walls where someone had skim-coated over active moisture damage — the plaster behind the patch had turned to a soft, chalky paste that had to be completely removed.
Choosing the right finish after repair
Once the repair is cured, the finish matters. A technically sound repair that’s finished poorly will still read as a flaw, while a well-finished repair can disappear entirely.
Good finishing practices
- Prime patched areas before painting — unprimed plaster absorbs paint differently, creating visible differences in sheen and color
- Use breathable coatings where appropriate — traditional lime-based paints or modern mineral paints allow the wall to manage moisture
- Match sheen and texture to the original wall — take the time to study the existing finish under different lighting conditions
- Test a small area first if the room has old finish layers — adhesion problems with old paint or varnish can ruin an otherwise good repair
Avoid
- Heavy texture products that do not belong on the wall — a 1920s smooth-troweled parlor wall should not suddenly have orange-peel texture over a patch
- Thick paint buildup that obscures detail — multiple layers of paint can soften the crisp edges of decorative plasterwork
- Aggressive sanding that changes the profile of the surface — the original surface has a skin that, once broken, cannot be restored
If the room has original decorative plaster, take extra care. Small losses in ornament can be more damaging visually than larger plain-wall repairs. A missing acanthus leaf on a cornice draws the eye more than a two-foot patch in a flat wall. In those cases, consider consulting a decorative plaster specialist who can take molds from intact sections and cast replacements.
DIY or hire a specialist?
Some repairs are realistic for a careful homeowner. Others are not. The line between them isn’t always obvious, but there are some reliable indicators.
Reasonable DIY projects
- Hairline crack repair — low risk, high success rate with proper preparation
- Small cosmetic patches — areas under about six inches in diameter with sound surrounding plaster
- Minor screw-and-washer stabilization — a few hollow spots on an otherwise sound wall
- Simple skim coats on non-decorative surfaces — flat walls without texture or ornament
Better left to a specialist
- Extensive separation from the lath — when more than about thirty percent of a wall is detached, the stabilization work becomes complex
- Ceilings with sagging sections — overhead work with heavy plaster is genuinely dangerous; a ceiling collapse can cause serious injury
- Water-damaged plaster with unknown extent — the visible damage often underestimates what’s happening behind the surface
- Decorative moldings or ceiling medallions — reproducing these requires specialized skills and materials
- Large areas needing matched plaster composition or finish — when the original plaster has a specific color, aggregate, or texture that needs to be replicated
If the wall is historic enough that matching texture, profile, and materials matters, experience becomes part of the preservation. The cost of a specialist is often less than the cost of repairing a failed DIY attempt — and far less than the cost of losing original fabric that cannot be replaced.
Practical checklist before you start
- Identify the source of damage — water, movement, vibration, or previous bad repair
- Determine whether the plaster is sound, loose, or missing — map the wall by tapping and visual inspection
- Test the area for hollow sounds and movement — mark the boundaries of any delaminated sections
- Clean dust and failed paint from the repair zone — vacuum thoroughly, then wipe with a barely damp sponge
- Choose a material compatible with the original wall — match hardness, porosity, and vapor permeability
- Repair in layers, not one thick pass — thin applications cure more evenly and bond better
- Match the surrounding surface finish — study the original under raking light to understand its texture and plane
- Prime and paint only after full cure — rushing this step is the most common cause of visible repair halos
- Monitor the area for recurring cracks — mark and date any new cracks to track whether movement is ongoing
FAQ
Can I use drywall compound on historic plaster?
Yes, for very small cosmetic repairs in low-stakes areas, but it is not the best choice for larger or deeper historic repairs. A compatible plaster-based repair usually performs better. Drywall compound is softer, less vapor-permeable, and behaves differently during moisture and temperature cycles. For anything beyond a nail hole, reach for a setting-type compound or a lime-based patching material.
How do I know if plaster needs replacement?
If the wall is extensively delaminated, crumbling throughout, or damaged by ongoing moisture and movement, replacement may be more practical than patching. Even then, try to preserve sound sections. I always advocate for saving what can be saved — partial replacement with careful transitions preserves more of the building’s history than a gut job.
Should I remove all old plaster before replastering?
No. If the existing plaster is stable, preserve it. Historic plaster often holds value in its original material, finish, and workmanship. The trowel marks, the slight irregularities, the evidence of the craft — these are not defects to be erased. They’re the reason we value old buildings in the first place.
Why does my repair keep cracking?
The most common reasons are unresolved movement, moisture, poor surface preparation, or a patch material that is too rigid for the surrounding wall. If you’ve patched the same crack three times, the crack is telling you something. Listen to it.
Can old plaster be saved if it sounds hollow?
Often yes. Hollow sound does not automatically mean failure. If the plaster is still intact, reattachment can stabilize it. The keys may be broken, but the plaster itself can be mechanically reattached with washers or adhesives. I’ve stabilized entire ceilings this way — the hollow sound disappears as the plaster is drawn back against the lath.
Final thought
Historic plaster walls reward patience. The best repairs are the ones that respect the original material, solve the underlying problem, and disappear into the room instead of announcing themselves. If you diagnose carefully and choose compatible materials, many old plaster walls can be kept in service for decades more.
There’s a particular satisfaction in running your hand over a wall you’ve repaired and feeling no trace of the work — just the continuous surface of a wall that has been standing since before you were born, and with proper care, will stand long after.