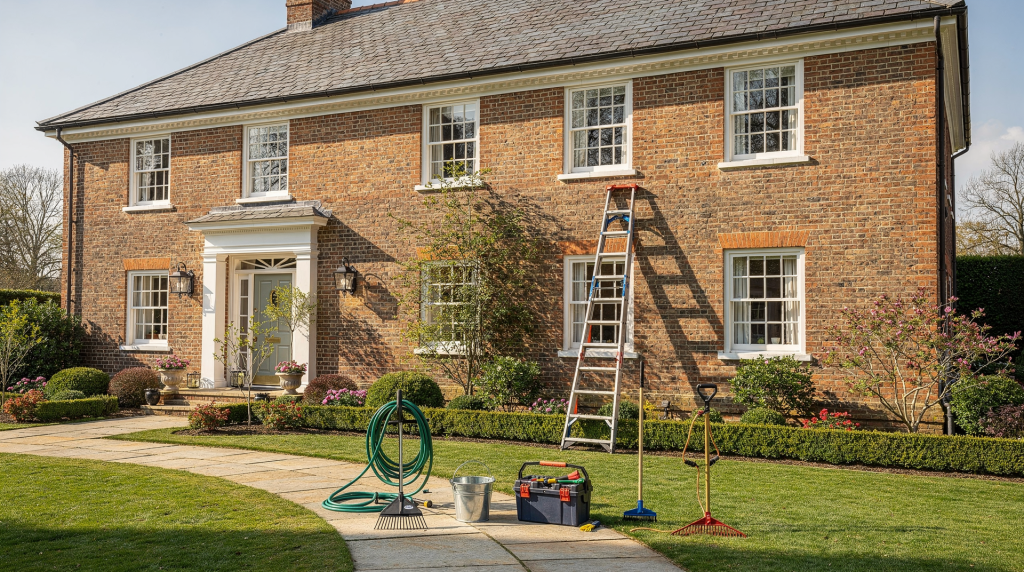
Historic houses reward steady care. Small problems that would be annoying in a newer home can become expensive or irreversible in an older one, especially when moisture, movement, and incompatible repairs are involved.
The safest approach is simple: inspect the house regularly, do the small work on time, and keep a written record of what changed. For historic buildings, seasonal maintenance is not optional upkeep; it is preservation.
Why seasonal maintenance matters in a historic house
Older homes were built with materials and methods that behave differently from modern construction. Lime mortar, wood windows, hand-laid roofing, plaster, and original trim often need gentler maintenance and more frequent checks.
I’ve walked through hundreds of historic properties where a single season of neglect turned a manageable repair into a five-figure restoration project. The pattern is almost always the same: water finds a way in, sits where it shouldn’t, and slowly undoes work that stood for a century or more. What makes seasonal maintenance different in these buildings is that the materials themselves demand a certain rhythm of attention. Lime mortar, for instance, needs to be checked after freeze-thaw cycles because it’s softer and more permeable than modern cement-based mixes — that permeability is intentional, allowing walls to breathe, but it also means the mortar erodes gradually and needs repointing on a timeline the building itself dictates. Wood windows swell and contract with humidity in ways vinyl replacements never will, and hand-laid slate or wood shingle roofing has joints and overlaps that shift subtly with temperature changes.
Seasonal maintenance helps you:
- catch leaks before they damage framing, plaster, or finishes
- prevent trapped moisture in walls, attics, and basements
- extend the life of original materials
- avoid repairs that remove historic fabric unnecessarily
- spot patterns early, such as recurring gutter overflow or paint failure
A good rule for most historic homes is to inspect the exterior in spring and fall, then add targeted checks after storms, freezes, heat waves, or heavy rain.
The core idea: inspect, document, act
Before getting into the seasonal checklist, use this simple workflow:
- Walk the property slowly and look up, down, and around.
- Photograph anything suspicious from the same angle each time.
- Write down what you saw, even if you do not fix it immediately.
- Prioritize anything that lets water in, traps water, or threatens safety.
- Schedule specialist work early, especially for roofing, masonry, plaster, and wood repair.
A written maintenance log is one of the most useful tools for a historic homeowner. It helps you distinguish new damage from old conditions and prevents repeat mistakes.
I’ve learned to trust the log more than my memory. On one Federal-era house I documented for several years, a hairline crack above the parlor window appeared every February and closed by June — seasonal movement from clay soil expansion, not structural failure. Without dated photographs and notes, that pattern would have been invisible, and the homeowner might have paid for unnecessary foundation work. The log also prevents what I call “repair amnesia,” where the same gutter corner gets cleaned out three times without anyone asking why debris collects there repeatedly. When you write it down, you start seeing the system, not just the symptom.
Historic house maintenance checklist by season
Spring: inspect winter damage and control moisture
Spring is the best time to see what freeze-thaw cycles, snow load, and ice dams did over the winter.
Exterior tasks
- Check the roof for missing, slipped, cracked, or loose materials.
- Inspect flashing around chimneys, dormers, vents, and valleys.
- Clean gutters and downspouts.
- Confirm that downspouts discharge away from the foundation.
- Look for peeling paint, open joints, and failed caulk.
- Check masonry for cracks, loose mortar, and damp staining.
- Inspect porches, stairs, railings, and posts for rot or movement.
- Examine foundation walls for new cracks, efflorescence, or persistent wet spots.
- Trim back vegetation touching the house.
Interior tasks
- Check ceilings and upper walls for stains or bubbling paint.
- Inspect attics for damp insulation, daylight through roofing, and moldy odors.
- Look in basements or crawlspaces for standing water, condensation, or fungus.
- Test windows and doors for swelling, sticking, or drafts after winter.
Why it matters
Spring is when winter damage becomes visible. If a roof leak or clogged gutter is ignored now, it often turns into wood decay, plaster failure, or mold later in the year.
I pay particular attention to efflorescence on foundation walls in spring. Those white, powdery deposits are salts left behind when water migrates through masonry and evaporates. A fresh bloom of efflorescence in March tells you that water moved through the wall during winter — and that’s a conversation you want to have with the building before the next freeze cycle. Similarly, bubbling paint on interior plaster near ceilings often traces back to ice dam leaks that were invisible from the ground in January. The stain might be small, but the water that caused it traveled through the roof deck, insulation, and lath before it showed up on your ceiling. That path needs to be understood and interrupted.
Summer: repair, repaint, and monitor heat stress
Summer offers stable weather and longer dry periods, which makes it ideal for many exterior repairs.
Exterior tasks
- Scrape and prepare failing paint where needed.
- Repair or replace damaged caulk only after identifying the cause of failure.
- Repoint small mortar defects with a compatible mix if the wall is otherwise sound.
- Repair rot in window sills, trim, porch elements, and soffits.
- Wash and inspect windows, screens, and storm windows.
- Service air-conditioning equipment and clean filters.
- Check attic ventilation and confirm exhaust fans vent properly.
- Monitor plant growth around foundations, walls, and roof edges.
Interior tasks
- Look for excessive indoor humidity.
- Watch for condensation on windows during humid spells.
- Inspire plaster for hairline cracks that may be seasonal movement rather than major settlement.
- Make sure air movement is not creating pockets of trapped moisture behind furniture or curtains.
Why it matters
Warm weather can hide problems. Paint failures, soft wood, and poor drainage are easier to address before fall rains and winter freezes return.
Summer is when I do most of my probing — literally. A thin awl pressed gently into window sills, porch column bases, and fascia board ends tells you more about wood condition than any visual inspection. Rot often starts inside the wood, where end grain absorbed moisture months ago, and by the time paint blisters, the damage is already well underway. I also use summer to check attic temperatures with an infrared thermometer. If the attic is consistently 130°F or higher on a 90°F day, ventilation is inadequate, and that heat is radiating down into the house while baking the roofing materials from underneath. Historic roof systems weren’t designed for the thermal loads we put on them with modern insulation and HVAC equipment, so ventilation becomes a preservation issue, not just a comfort one.
Fall: prepare for water, wind, and freezing temperatures
Fall is the most important preparation season for a historic home.
Exterior tasks
- Clean gutters after leaf drop.
- Flush downspouts and make sure water exits well away from the foundation.
- Check roofing, flashing, and chimney joints before the first freeze.
- Seal obvious gaps where pests, wind, or water may enter.
- Store or install storm windows where appropriate.
- Remove leaves and debris from roof valleys, low spots, and behind chimneys.
- Inspect grading around the foundation for ponding or soil settling.
- Trim branches that could strike the house in winter storms.
Interior tasks
- Test heating systems before cold weather arrives.
- Look for drafts around windows, doors, attic hatches, and basement access points.
- Make sure pipes in vulnerable areas are insulated.
- Inspire the basement or crawlspace after heavy rain.
- Confirm that dehumidifiers, sump pumps, and drains are working.
Why it matters
Most cold-weather damage starts with water management failures in fall. A clean gutter and a safe roof edge can prevent ice dams, leaks, and freeze-thaw damage.
I’ve seen more historic plaster ceilings destroyed by clogged gutters than by any other single cause. Here’s the chain: leaves accumulate in the gutter, water backs up behind the debris, spills over the rear edge of the gutter, runs down the fascia, and seeps into the soffit and wall cavity. By the time you see the brown stain on the dining room ceiling, the water has been traveling through the building envelope for weeks or months. Fall gutter cleaning isn’t just about keeping things tidy — it’s about breaking that chain before the first freeze locks everything in place. I also recommend checking chimney mortar joints in fall with binoculars. A cracked crown or deteriorated pointing at the top of the chimney lets water into the flue and the attic, and freeze-thaw cycles will widen those openings dramatically over a single winter.
Winter: monitor snow, ice, and indoor conditions
Winter maintenance is mostly observation, but it is still critical.
Exterior tasks
- Watch for ice dams, heavy icicles, and uneven snow melt on the roof.
- After storms, check for slipped roofing, blocked vents, or damaged flashing.
- Clear snow safely away from entries, steps, and vulnerable drainage areas.
- Look for ice near downspout outlets and foundation walls.
Interior tasks
- Check ceilings and attic areas after major snow or wind events.
- Keep indoor humidity moderate to protect plaster, woodwork, and window glazing.
- Watch for condensation on windows, which can signal humidity problems or cold air leaks.
- Inspire basement or crawlspace areas for unusual dampness during thaws.
Why it matters
Winter problems often stay hidden until spring, but the damage starts immediately. Ice dams, for example, are not just a roof issue; they often mean heat loss from the attic and water intrusion at the eaves.
Uneven snow melt on a roof is one of the most useful diagnostic tools you have in winter. If snow melts in patches while the rest of the roof stays covered, those bare spots are telling you exactly where heat is escaping from the house below. In an older home, that often points to missing or compressed insulation, unsealed attic hatches, or recessed light fixtures that weren’t designed for insulated ceilings. I’ve traced ice dam problems back to a single uninsulated bathroom exhaust duct that was warming a section of roof deck just enough to melt snow, which then refroze at the colder eaves. The fix wasn’t a new roof — it was sealing and insulating the duct. Winter observation gives you that kind of information if you know what to look for.
Seasonal checklist at a glance
| Season | Main focus | Highest-priority items |
|---|---|---|
| Spring | Repair winter damage | Roof, flashing, gutters, attic leaks, foundation moisture |
| Summer | Restore and stabilize | Paint, caulk, wood repair, masonry touch-ups, HVAC service |
| Fall | Prepare for wet and freezing weather | Gutters, downspouts, chimney, storm windows, drainage |
| Winter | Monitor active risks | Ice dams, snow load, condensation, pipe and basement issues |
What to inspect every season, no matter the weather
Some tasks should never wait for a particular month.
Always-check items
- Roof surfaces and flashing
- Gutters and downspouts
- Foundation drainage
- Basement or crawlspace moisture
- Visible wood rot
- Window and door operation
- Paint failure that may indicate hidden moisture
- Interior stains, odors, or new cracks
- Signs of pests or bird entry around soffits, vents, and eaves
These are the systems most likely to cause expensive damage if neglected.
I’d add one more to this list that isn’t always obvious: the ground immediately around the foundation. Soil should slope away from the house for at least six feet, dropping about one inch per foot. In older homes, decades of landscaping, settling, and additions often disrupt that slope, and I’ve found foundation planters that actually trapped water against the sill. Checking grade is a five-minute walk around the house, but it can prevent water from ever reaching the basement walls in the first place.
How to inspect without harming historic materials
Historic houses are easy to damage with well-intentioned maintenance. A few habits help avoid that.
Use the right mindset
- Start with observation, not repair.
- Identify the cause before patching symptoms.
- Match new materials to old ones when possible.
- Favor reversible repairs over permanent alterations.
Use the right tools
- Binoculars for rooflines and upper masonry
- Flashlight for attic, basement, and crawlspace checks
- Camera or phone for photos
- Notebook or digital log
- Moisture meter if you know how to interpret it
- Ladder only when needed and used safely
Avoid these common mistakes
- Power washing soft masonry or historic wood
- Sealing moisture into walls with the wrong paint or caulk
- Replacing original windows without checking whether they can be repaired
- Using modern mortar that is harder than the historic brick
- Ignoring minor leaks because “they are small”
- Painting over recurring moisture problems instead of finding the source
I want to emphasize the mortar issue because it’s one of the most frequent and damaging mistakes I encounter. Historic brick was fired at lower temperatures than modern brick and is relatively soft and porous. It was designed to work with lime-based mortar that’s even softer, so that any movement or moisture expansion gets absorbed by the mortar joints rather than cracking the brick itself. When someone repoints with hard Portland cement mortar, the dynamic reverses: the mortar becomes stronger than the brick, and freeze-thaw cycles or minor settling start spalling the brick faces instead. I’ve seen entire walls of 18th-century brick destroyed this way within a decade. The rule is simple: the mortar should always be the sacrificial element, not the masonry unit. If you’re unsure what mix your building needs, a mortar analysis from a conservation lab costs a few hundred dollars and can save tens of thousands in brick repair.
Special attention areas in historic homes
Roofs and flashing
The roof is the first line of defense. On older homes, small failures around valleys, chimneys, and dormers often cause the worst damage inside the house.
Flashing is where I start every roof inspection. The junction between a chimney and the roof plane is inherently vulnerable because the masonry moves differently than the wood framing, and the flashing has to accommodate that differential movement while remaining watertight. On historic homes, you often find soldered copper or terne-coated steel flashing that’s been in place for 60 or 80 years — far longer than modern materials would last — but when it fails, it tends to fail at the solder joints or where someone caulked a gap that should have been resoldered. Caulk is not a substitute for proper metalwork, and I’ve opened up roof assemblies where a bead of silicone was the only thing standing between the attic and a steady drip.
Gutters and downspouts
A historic house with bad drainage will often show it first in the paint, masonry, or basement. Clean, sound gutters are one of the cheapest forms of preservation.
Built-in gutters — the kind integrated into the cornice or roof structure rather than hung from the edge — deserve special vigilance. They’re common on Greek Revival and Italianate houses, and when they leak, the water goes directly into the wall assembly or the interior plaster. I inspect these from inside the attic if possible, looking for water stains on the roof sheathing near the eaves. A pinhole leak in a built-in gutter can saturate insulation and lath for years before anyone notices the damage from below.
Windows
Original windows are worth keeping if they can be repaired. Broken glazing, failing putty, sash issues, and poor weatherstripping are common, but they do not automatically mean replacement.
The wood in historic windows — often old-growth pine or cypress — is denser and more rot-resistant than anything available today. I’ve restored sashes from the 1840s where the only damage was in the bottom rail and the sill, and the rest of the window was perfectly sound after stripping and reglazing. The decision to repair versus replace usually comes down to the condition of the joinery: if the mortise-and-tenon joints at the corners are still tight, the window can almost always be saved. If they’ve opened up and the sash is racking, you’re looking at more involved millwork, but even then, a good wood window specialist can often splice in new wood rather than building from scratch.
Masonry
Historic brick and stone need to breathe. Cracks, spalling, or crumbling mortar should be addressed with compatible materials, not hard modern patching that can make the problem worse.
Spalling — where the face of the brick or stone flakes off — is almost always a moisture problem. Water enters the wall, freezes, and pops the surface off from within. But the water’s entry point isn’t necessarily where the spalling appears. I’ve traced spalling on a south-facing wall back to a failed parapet cap on the north side of the same building. The water traveled through the wall cavity and concentrated at a different elevation and exposure. Before you repoint or patch spalled masonry, find out how the water is getting in and where it’s going. Otherwise, you’re treating the symptom while the cause keeps working.
Woodwork
Rot often begins where water lingers: sill ends, porch posts, fascia boards, and trim joints. Early probing and prompt repair usually save original fabric.
The end grain of wood absorbs moisture like a bundle of straws, which is why sill ends and the bottoms of porch columns rot first. On a recent project, we saved a set of 1880s porch columns by cutting out the bottom 18 inches of rot, treating the remaining wood with borate preservative, and scarfing in new wood with epoxy and stainless steel pins. The repair is invisible under paint, and the columns will last another century. The alternative — replacing them with fiberglass or new wood — would have cost more and erased the original material. Early detection made the difference: the rot hadn’t yet reached the turned sections of the columns, so the visible historic fabric was preserved intact.
A practical annual workflow
Use this simple sequence every year:
- Spring inspection after thaw.
- Summer repairs while weather is dry.
- Fall cleaning and weatherproofing.
- Winter monitoring after storms.
- Update the maintenance log and photos after each visit.
If you only have time for one structured process, make it this one. It captures the full cycle of risk around a historic building.
Maintenance record template
A basic log can be as simple as this:
| Date | Area inspected | Condition found | Action taken | Next follow-up |
|---|---|---|---|---|
| March 12 | South roof edge | Gutter overflow stain | Cleaned gutter, checked downspout | Reinspect after next storm |
| June 8 | Porch columns | Soft spot at base of one column | Marked for wood repair | Contractor visit planned |
| October 3 | Basement wall | Damp corner after rain | Adjusted downspout extension | Check again in 2 weeks |
This kind of record becomes invaluable when deciding whether a problem is new, seasonal, or long-term.
I recommend adding a column for weather conditions during the inspection. A damp basement corner noted on October 3 after two inches of rain means something different than the same dampness noted after a dry week. Context helps you distinguish between a drainage problem that needs immediate attention and a groundwater issue that only appears during exceptional weather events. Over several years, these patterns tell you more about the building’s behavior than any single inspection ever could.
When to call a specialist
Some issues are fine for a homeowner to monitor, but others need professional help.
Call a specialist when you see:
- active roof leaks
- widespread rot
- structural cracking
- bulging or unstable masonry
- persistent basement water intrusion
- damaged plaster with no obvious surface cause
- chimney movement or severe mortar loss
- recurring moisture problems you cannot trace
Historic houses often fail in layers. A surface symptom may be hiding a deeper issue, so professional diagnosis can save money.
I’ll add one nuance here: structural cracking isn’t always as alarming as it looks, and non-structural cracking isn’t always benign. A vertical crack at the corner of a window opening that’s been the same width for twenty years is probably just thermal movement. But a diagonal crack that’s widened from hairline to 1/8 inch in six months, especially if it runs through multiple bricks rather than following mortar joints, deserves a structural engineer who understands historic construction. The key is the rate of change, not just the presence of the crack. That’s another reason the maintenance log matters — without it, you have no baseline for comparison.
FAQ
How often should a historic house be inspected?
At minimum, inspect it in spring and fall, with quick checks after major storms, freezes, or heavy rainfall.
What is the most important maintenance task for a historic home?
Keeping water out. Roofs, gutters, downspouts, and foundation drainage deserve the closest attention.
Should I replace old windows or repair them?
If the windows are structurally sound, repair is usually the better first option. Many historic windows can be improved with glazing repair, weatherstripping, and careful restoration.
Is it safe to pressure wash a historic house?
Usually not. High pressure can damage wood, masonry, mortar, and old paint layers.
What should I document during maintenance?
Take photos, note dates, describe the condition, and record every repair or change. That record helps track patterns and plan future work.
Conclusion
A historic house stays healthy through consistent, seasonal attention. The goal is not to chase every small flaw, but to understand how the building behaves, stop water early, and preserve original materials whenever possible.
If you inspect regularly, document what you find, and act before minor issues spread, you protect both the house’s structure and its history.
After fifteen years of working with these buildings, I’ve come to see seasonal maintenance as a form of conversation. The house tells you what it needs if you pay attention — a damp corner here, a sticky window there, a patch of peeling paint that wasn’t peeling last season. Your job is to listen, respond appropriately, and keep the dialogue going. The buildings that survive in the best condition aren’t necessarily the ones with the biggest restoration budgets. They’re the ones where someone noticed the small things, wrote them down, and dealt with them before they became large things. That’s preservation at its most practical and effective.