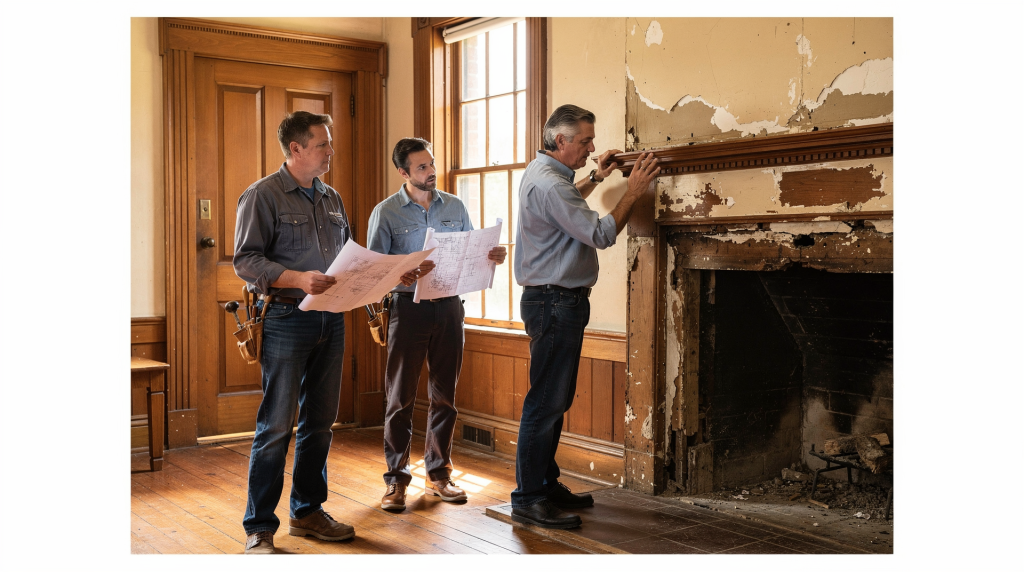
A successful historic home restoration rarely starts with a wish list. It starts with the building itself—its materials, its story, and the quiet evidence of how it has weathered the decades. Over years of working with old houses, one pattern repeats: the projects that take time to read the building before making changes are the ones that endure. Owners who learn where the water travels, which mortar was used, and why a window was built a certain way end up with a home that keeps its integrity long after the paint dries. The most instructive lessons come from watching skilled craftspeople work—and from the mistakes that teach owners what not to do.
Why historic homes need a different approach
Old houses were assembled with materials and methods that have little in common with modern construction. The lime mortar in a 19th-century brick wall was designed to let moisture migrate and evaporate; the old-growth pine in a floorboard has a density and resin content you won’t find in today’s fast-farmed lumber. Original sash windows, plaster on wood lath, and hand-planed trim all move, breathe, and age differently than their modern counterparts. When you treat these assemblies like new construction—sealing them up with impermeable coatings, replacing soft brick with hard cement, or swapping out windows for vinyl units—you often create problems that spread behind the walls. The fundamental rule in preservation is simple: repair first, replace only when necessary. Guidance from the Secretary of the Interior’s Standards and decades of field experience consistently point toward maintaining original fabric, making compatible repairs, and keeping interventions reversible whenever possible. This approach doesn’t just protect character; it protects the long-term physical and financial value of the house.
What owners usually learn first
Every historic home teaches its own lessons, but certain truths surface in almost every project. The most important one is that the visible problem is rarely the whole problem. A patch of peeling paint or a bulging plaster ceiling usually has a story behind it, and that story often involves water.
1. Water is usually the real enemy
Paint failure, soft plaster, wood rot, efflorescence on brick, and settlement cracks all tend to trace back to moisture. Before any cosmetic work begins, a thorough moisture investigation is the smartest investment you can make. Walk the house with a critical eye and check:
- Roof leaks—look for water stains on attic framing, not just missing shingles
- Clogged gutters and downspouts that spill water against the foundation
- Poor grading that directs runoff toward the basement walls
- Failed flashing around chimneys, dormers, and window heads
- Plumbing leaks hidden inside walls or beneath floors
- Moisture trapped by modern impermeable materials, such as vinyl wallpaper on exterior walls or cement parging over stone
If the building keeps getting wet, no finish work will last. I’ve seen owners repaint a parlor three times before someone finally looked up and found a rusted-through valley flashing two stories above. Solve the water first, and everything else gets easier.
2. Old materials can often be saved
Many owners assume that original windows, plaster, doors, and trim are beyond saving when they are simply dirty, loose, or worn. In reality, the materials in a historic house are often of higher quality than anything you can buy today. Craftspeople who specialize in old buildings regularly see original components outlast modern replacements after a proper repair. Good examples include:
- Re-sash and weatherstrip original windows instead of replacing them—the old-growth wood can be repaired and the weight-and-pulley system made to operate smoothly again
- Patch plaster rather than covering it with drywall; a skilled plasterer can reattach loose keys, fill cracks with compatible lime-based mixes, and preserve the subtle undulations that give a room its character
- Repair wood members with dutchman patches or epoxy consolidation when rot is localized, rather than cutting out entire beams or sills
- Repoint brick or stone with a lime-rich mortar that matches the original in strength and porosity, not a hard modern mix that will force damage into the masonry units
The key is to assess the material honestly. A window sash with a few inches of rot at the sill can be repaired; one that is more than 50% deteriorated might need replacement with a historically accurate replica. The goal is to keep as much original fabric as possible.
3. “Upgrading” can cause damage
Not every modern improvement is a good fit for a historic building. The impulse to “upgrade” often leads to interventions that trap moisture, abrade surfaces, or permanently alter the way the building performs. Common mistakes include:
- Sandblasting delicate brick or wood—this strips away the protective fire-skin or patina and opens the surface to accelerated decay
- Using hard, Portland-rich mortar on soft historic brick—the brick becomes the sacrificial layer, spalling and cracking while the mortar stays intact
- Painting damp masonry with non-breathable coatings—moisture gets trapped behind the film and pushes off the surface
- Installing rigid foam insulation against old foundation walls without managing moisture—this can lead to rot and mold in the sill beam
- Replacing character-defining features like original stair balusters or porch columns without understanding their role in the overall design
A better question than “Is this newer?” is “Will this work with the house?” The building has a physical logic that has kept it standing for a century or more; any change should respect that logic.
How craftspeople think about restoration
Experienced preservation carpenters, masons, plasterers, and window specialists approach a project from a different set of priorities than general remodelers. Their sequence matters, and their diagnostic habits are worth understanding.
The restoration order that saves money later
A logical sequence prevents expensive rework. The order that most seasoned professionals follow looks like this:
- Stabilize the structure—address any foundation settlement, sagging floors, or compromised framing
- Stop active water entry—fix roof leaks, flashing, gutters, and grading
- Address hazards and code issues—deal with unsafe wiring, lead paint, asbestos, and egress requirements
- Repair the building envelope—restore the roof, walls, windows, and doors as a complete weather barrier
- Restore interior finishes—plaster, floors, trim, and built-ins
- Add efficiency upgrades carefully—insulation, HVAC, and weatherization that don’t trap moisture
- Finish with paint, trim, and details
This order isn’t arbitrary. If you repaint the trim before the roof leak is fixed, you’ll be repainting again after the next storm. If you insulate the attic before sealing the bypasses that let warm, moist air rise from the house, you risk condensation and rot in the roof sheathing. Working from the outside in and from the top down keeps you from undoing your own work.
What good craftspeople look for first
When a seasoned craftsperson walks into a historic house, they aren’t just looking at the surface. Their eyes move to the places where trouble hides. They will usually inspect:
- Movement in the structure—cracks that have opened recently, doors that no longer latch, floors that slope in new directions
- Moisture paths—stains, efflorescence, musty smells, and the condition of the soil around the foundation
- Material compatibility—whether previous repairs used materials that are too hard, too soft, or too impermeable for the original assembly
- Previous repairs that failed—patches that have cracked again, pointing that has fallen out, caulk that has pulled away
- Hidden damage behind patchwork—what looks like a small crack in plaster may indicate a larger structural shift or a long-term leak
- Signs of alteration that changed how the house breathes—replacement windows that don’t have the same ventilation patterns, or added insulation that blocked intentional air flow
This is why preservation work often looks slow at first. The goal is not speed. It is accuracy. A good craftsperson wants to understand the building as a system before they touch a single surface.
Historic home restoration lessons by building part
Roof and upper walls
The roof is the first line of defense. Missing shingles, failed flashing, and blocked drainage can destroy finishes below in a single season. When inspecting, look for:
- Curling or missing roofing material
- Rusted or lifted flashing at chimneys, valleys, and dormers
- Debris in valleys that holds moisture against the roof surface
- Failed chimney mortar—often visible as loose bricks or white staining
- Water stains in attic framing, especially around penetrations and at the eaves
Don’t forget the upper walls. Check for open mortar joints, failed caulking around windows, and any place where water can get behind the siding or masonry.
Windows and doors
Original windows are often repairable, even when they feel drafty. Many are inefficient because they are neglected—sash cords are broken, glazing putty is missing, and the meeting rails don’t close tightly—not because they are inherently bad. Best practices include:
- Repair sash cords, weights, and hardware so the window operates smoothly and seals properly
- Add weatherstripping—bronze or silicone bulb types can dramatically reduce air infiltration without altering the window’s appearance
- Use historically compatible storm windows if needed; exterior storms protect the original sash and improve thermal performance
- Preserve original glass where possible—old glass has a slight waviness and character that reproduction glass rarely matches
- Avoid replacing good wood frames just because they need work; a dutchman repair at the sill is far less invasive than a full replacement
Masonry
Historic brick and stone need breathable materials. Hard, Portland-rich mortar can trap moisture and force damage into the brick itself. Watch for:
- Cracked or recessed mortar joints—these let water in and accelerate freeze-thaw damage
- Spalling brick faces—the outer layer of the brick breaks away, often because the mortar is too hard
- White salt deposits (efflorescence)—a sign that water is moving through the wall and carrying soluble salts to the surface
- Cracks that widen after freeze-thaw cycles—water enters, freezes, expands, and gradually breaks the masonry apart
Repointing should always use a mortar that matches the original in composition, strength, and porosity. A simple field test: the mortar should be softer than the brick or stone, so it sacrifices itself rather than the historic units.
Plaster and interiors
Old plaster often fails from movement or leaks, not age alone. Small cracks are common and not always serious—they may simply reflect seasonal expansion and contraction. The repair approach should be:
- Stabilize the cause first—fix the leak, reinforce the framing, or address the vibration before touching the plaster
- Reattach loose plaster where possible, using plaster washers and screws or injection adhesives
- Patch with compatible materials—a lime-based plaster that matches the original in texture and hardness
- Avoid covering everything with drywall unless the damage is truly extensive; drywall changes the acoustic and moisture behavior of the wall and erases the subtle character of hand-troweled plaster
Mechanical systems
Electrical, plumbing, HVAC, and insulation usually need updating, but the work should be planned around the historic fabric. The typical rule is to put systems in without cutting more historic material than necessary. Route chases and lines carefully—through closets, along existing chases, or in areas that are already damaged. Keep access points logical for future repairs, and document where everything runs so the next person doesn’t have to guess. When adding insulation, choose materials that allow the wall assembly to dry to at least one side; closed-cell spray foam in an old brick wall, for example, can create a moisture trap that rots the framing.
A practical restoration checklist for owners
Use this as a starting point before major work. It won’t catch everything, but it will surface the most common issues.
Exterior checklist
- Inspect roof condition—look for missing shingles, cracked flashing, and sagging areas
- Clean gutters and downspouts; make sure water discharges at least five feet from the foundation
- Check grading near the foundation—soil should slope away, not toward the house
- Look for peeling paint or failed coatings that may indicate moisture behind the film
- Examine chimney mortar and flashing for gaps or deterioration
- Test windows and doors for operation; note any that stick, rattle, or won’t close fully
- Note any soft wood, rust, or visible rot on trim, siding, and porches
Interior checklist
- Look for stains on ceilings and walls—trace them upward and outward to find the source
- Check floors for bounce or slope changes; a sudden dip may indicate a compromised joist or sill
- Inspect plaster for movement or separation—tap gently to find hollow areas
- Test outlets and older wiring for safety concerns; look for knob-and-tube wiring that may be hidden in walls
- Watch for musty smells that suggest hidden moisture in basements, crawlspaces, or behind walls
- Review basement and attic conditions—look for water entry, pest activity, and adequate ventilation
Decision checklist
Ask these questions before approving any work:
- Can this be repaired instead of replaced?
- Does the new material match the old one in behavior—porosity, flexibility, thermal movement?
- Will this change be reversible in the future?
- Could this trap moisture against historic fabric?
- Does this remove a character-defining feature?
- Have I identified the cause, not just the symptom?
Common mistakes owners make
| Mistake | Why it causes trouble | Better approach |
|---|---|---|
| Replacing original windows too quickly | Loses historic fabric and often ignores repairable issues | Repair, weatherstrip, and add storm windows when appropriate |
| Using hard mortar on soft brick | Brick fails before the mortar does | Match mortar to the historic masonry in strength and composition |
| Sealing every surface tightly | Traps moisture and accelerates decay | Let the building dry as intended—use breathable paints and avoid interior vapor barriers on old walls |
| Fixing finishes before leaks | Damage returns after the next rain | Solve water problems first, then address cosmetics |
| Treating all old-house issues as cosmetic | Hidden structural or moisture problems get missed | Investigate the cause before patching—look behind the stain, not just at it |
| Using abrasive cleaning methods | Strips surfaces and weakens materials | Use gentler cleaning methods compatible with the material—low-pressure water, soft brushes, chemical poultices if needed |
How to plan a restoration project without getting overwhelmed
Historic homes can feel endless if you try to do everything at once. A better strategy is to divide the work into phases that follow the building’s priorities. This keeps the project manageable and prevents you from spending money on finishes that will be damaged by later structural or envelope work.
Phase 1: Protect the building
- Stop leaks—roof, flashing, plumbing
- Stabilize structural concerns—sagging beams, cracked lintels, foundation settlement
- Remove immediate hazards—unsafe wiring, loose masonry, trip hazards
- Secure openings and exposed materials—board up broken windows, tarp damaged roofs
Phase 2: Repair the envelope
- Roof—replace missing shingles, repair flashing, ensure proper ventilation
- Flashing—at chimneys, dormers, valleys, and wall intersections
- Gutters and downspouts—clean, repair, and redirect discharge
- Masonry—repoint, repair spalls, address rising damp if present
- Windows—restore sashes, replace broken glass, add weatherstripping
- Doors—repair frames, thresholds, and hardware; ensure proper weather seal
Phase 3: Restore key interiors
- Plaster—reattach, patch, and skim coat as needed
- Floors—repair damaged boards, address squeaks, refinish if appropriate
- Trim—repair or replicate missing moldings, baseboards, and casings
- Built-ins—restore cabinets, bookcases, and window seats
- Stairs—tighten balusters, repair treads, and restore handrails
- Fireplaces and surrounds—clean, repoint, and restore mantels
Phase 4: Improve performance carefully
- Insulation where it will not trap moisture—attic floors, basement rim joists, and walls only after careful hygrothermal analysis
- HVAC upgrades—high-velocity mini-duct systems or ductless splits that minimize invasive chases
- Electrical updates—new wiring routed through existing cavities; replace knob-and-tube where accessible
- Plumbing modernization—replace galvanized pipes, add shut-off valves, insulate pipes in unconditioned spaces
- Lighting improvements—add discreet recessed or track lighting that doesn’t damage historic ceilings
This sequence reduces risk and keeps the project grounded in the building’s actual condition. It also helps you budget realistically, because you’re not guessing about hidden damage behind finishes that haven’t been opened yet.
When to bring in specialists
Some jobs are worth hiring out from the start because mistakes are expensive and often irreversible. A general contractor may be fine for some tasks, but historic homes often need people who understand older assemblies and older materials. Bring in a specialist when you need:
- Structural diagnosis—a structural engineer with experience in historic timber or masonry
- Historic masonry repair—a mason who works with lime mortars and understands traditional bonding patterns
- Plaster restoration—a plasterer who can match original mixes and textures
- Window restoration—a craftsman who can repair sash, weights, and pulleys, and replicate historic glass
- Conservation-grade woodwork—for carved elements, inlay, or complex joinery
- Lead or asbestos handling—required by law in many jurisdictions; improper removal can create health hazards and legal liability
- Permit or code guidance in a historic district—a local preservation consultant or architect who knows the review board’s expectations
Don’t assume that a specialist is always more expensive. A bad repair often costs more to undo and redo than doing it right the first time.
How owners and craftspeople work best together
The best restoration projects are collaborations. Owners bring context, priorities, and budget reality. Craftspeople bring material knowledge and experience with failure patterns. Good communication looks like this:
- Share what has already failed and when—a timeline of problems helps the craftsperson diagnose root causes
- Ask what the likely cause is before approving repairs—don’t just treat the symptom
- Request photos or documentation of hidden conditions—what’s inside the wall, under the floor, behind the plaster
- Clarify whether repairs are temporary, partial, or permanent—so you know what to expect in five or ten years
- Keep a record of materials, paint colors, mortar mixes, and methods—this record matters later, especially when the next owner or contractor opens the wall again
That documentation is a gift to the house’s future. I’ve opened walls and found a penciled note from a 1920s plasterer with his name and the date; that kind of record connects the building’s caretakers across generations.
A simple rule for every decision
If a change removes historic material, ask whether the benefit is worth the loss. If a repair can be done in a way that preserves the original fabric, that is usually the better long-term choice. Historic homes reward patience. The houses that survive with their character intact are usually the ones cared for by people who learned to read the building before they tried to remake it. Every crack, every layer of paint, every worn threshold tells a story. Listen to it first, and the restoration will almost always find its right path.
FAQ
What is the first thing to do when restoring a historic home?
Start by stopping water intrusion and checking the structure. Roofs, gutters, flashing, and grading should be reviewed before any cosmetic work. A thorough moisture assessment and a structural walk-through will reveal the priorities that must be addressed to protect the building.
Should original windows always be replaced?
No. In many historic homes, original windows can be repaired, weatherstripped, and made more efficient while preserving the building’s character. The old-growth wood and traditional joinery often outperform modern replacements once restored, and the original glass contributes irreplaceable character.
What materials are most risky in old-house restoration?
Hard mortar, abrasive cleaners, impermeable coatings, and aggressive sanding or blasting often damage historic materials. Any material that traps moisture or is harder than the original fabric can cause accelerated decay.
How do you know if a repair is appropriate for a historic house?
It should be compatible with the original material, solve the underlying problem, and avoid unnecessary loss of historic fabric. A good repair works with the building’s natural moisture and thermal movement, rather than fighting it.
When should a specialist be hired?
Hire a specialist for structural issues, masonry, plaster, window work, hazardous materials, or any repair where the wrong method could permanently damage the house. The cost of a specialist is almost always less than the cost of undoing a bad repair.