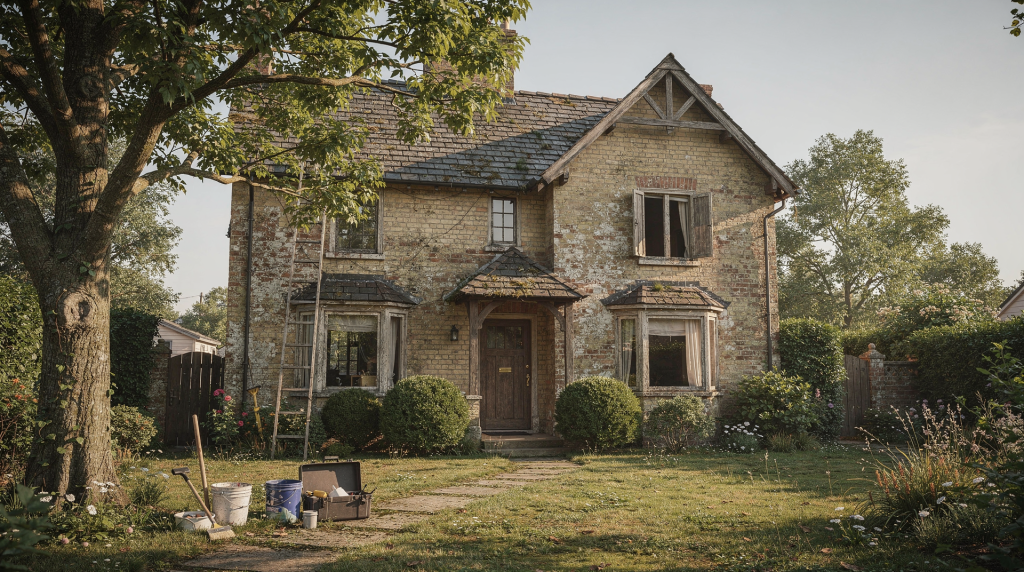
An old house stays healthy when preservation is treated as a system, not a reaction. A long-term plan helps you prevent damage, prioritize the right repairs, and protect historic materials before small issues become expensive losses. Over years of inspecting buildings, I’ve seen that the most costly mistakes come from waiting until damage is obvious—by the time paint peels, plaster cracks, or a chimney leaks badly, the problem has often been building for months or years.
Why a preservation plan matters
Old houses usually fail in predictable places: roofs, gutters, windows, masonry, foundations, and building systems. A good plan focuses on those weak points first and keeps the work consistent over time. Preservation also means repairing historic materials whenever possible instead of replacing them unnecessarily. The real danger isn’t age—it’s neglect that allows water, movement, and decay to gain a foothold. A plan turns sporadic fixes into a deliberate sequence of care.
Start with a simple preservation framework
A usable plan does not need to be complicated. It should answer four questions:
- What is significant about this house?
- What condition is it in now?
- What needs attention first?
- How will you track and repeat the work?
A preservation plan should document the building’s history, identify character-defining features, establish priorities, and guide future treatment. It’s a living document that grows with the house.
Step 1: Identify what makes the house worth preserving
List the features that define the house’s character. These are the elements that carry the imprint of the builders and the era. They may include:
- Original windows with hand-rolled glass and early sash weights
- Historic siding or masonry—whether clapboard, shingle, or brick laid in a Flemish bond
- Roof shape and trim, including cornice returns and raking mouldings
- Interior plaster, millwork, or stair details that show the tool marks of craftsmen
- Chimneys, porches, cornices, or decorative brickwork
These are the parts that should be retained, repaired, and documented carefully. They carry the architectural DNA of the house.
Step 2: Record the current condition
Walk the property and create a baseline record. Take dated photos, note problem areas, and keep everything in one folder or binder. Inspecting at least twice a year is a practical minimum for historic buildings—I recommend early spring and late autumn, when seasonal stresses reveal hidden defects. Focus on:
- Roof surfaces and flashings—look for lifted seams, rust, or missing sections
- Gutters and downspouts—check for sagging, clogs, and separation from the fascia
- Foundation walls—map cracks and monitor them with dated measurements
- Siding, masonry, and trim—probe for soft wood, spalling brick, or failing mortar
- Windows and doors—test operation, examine putty, and look for moisture ingress at sills
- Interior signs of moisture—stains, efflorescence, or musty smells in corners and closets
- Heating, wiring, plumbing, and other systems—note age, condition, and any ungrounded outlets or corroded pipes
Build a maintenance schedule that fits the house
A long-term plan works best when you divide it into seasonal and annual tasks. Regular maintenance reduces the need for major repairs later and helps preserve original materials. The rhythm of the seasons dictates the stress on the building: freeze-thaw cycles, summer storms, and autumn debris all have predictable effects.
Seasonal checklist
| Timing | What to check | Why it matters |
|---|---|---|
| Spring | Roof leaks, gutters, masonry cracks, drainage around the foundation | Winter freeze-thaw cycles often leave hidden damage that becomes visible as snow melts and soils shift |
| Summer | Exterior paint, wood rot, window operation, caulking | Warm, dry weather is ideal for repairs and painting—catch rot before it spreads |
| Fall | Heating system, chimney, weatherstripping, gutter cleaning | Prepares the house for freeze-thaw and storms; clogged gutters in winter can lead to ice dams |
| Winter | Ice dams, interior moisture, drafts, pipe safety | Catches hidden failures early—condensation on windows or cold spots can point to insulation gaps |
Annual priorities
- Inspect every window for rot, broken glass, or failing glazing compound—old linseed-oil putty dries out and cracks, letting water into the sash
- Check mortar joints, brick, and stone for cracks or moisture movement—lime mortar erodes over time, and hard cement repointing can trap moisture and spall the brick
- Examine roof flashing around chimneys, valleys, dormers, and vents—these are the most common entry points for water
- Review exterior paint failure to find the cause, not just the symptom—peeling often signals moisture behind the film or poor surface preparation
- Inspect plumbing lines, heating equipment, and wiring for age-related issues—old knob-and-tube wiring or galvanized pipes may need attention
- Test basement or crawlspace moisture conditions after heavy rain—persistent dampness leads to rot in joists and sill beams
Know what to repair first
Not every defect is equally urgent. Prioritize issues that let water in, threaten structural stability, or accelerate decay. Water is almost always the enemy behind the enemy—it triggers rot, corrosion, freeze-thaw spalling, and mold. A peeling painted surface may be cosmetic; the leak behind it is what destroys historic fabric.
Highest-priority problems
- Active roof leaks—even a small drip can saturate insulation and rot roof sheathing within weeks
- Failing gutters or downspouts—water cascading down walls erodes mortar and invites damp into the interior
- Foundation movement or water intrusion—cracks wider than 1/8 inch or efflorescence signal ongoing problems
- Broken flashing around chimneys or valleys—often hidden, these failures channel water directly into the structure
- Severe wood rot at sill, porch, window, or trim locations—compromised sills can affect the entire wall assembly
- Failed masonry mortar or open cracks—water enters, freezes, and widens the gaps exponentially
- Electrical, plumbing, or heating hazards—safety risks that must be addressed before any cosmetic work
Use the repair hierarchy: preserve, repair, replace last
A long-term plan should follow a simple rule: keep original material whenever it can still perform its job. Preservation standards define this approach as maintaining existing form, integrity, and materials through ongoing maintenance and repair rather than extensive replacement. This isn’t just philosophy—old-growth wood is denser and more rot-resistant than modern lumber, and historic glass has a character that can’t be replicated.
Practical decision rule
- Preserve: clean, stabilize, monitor—for example, consolidate flaking plaster with an adhesive injection rather than tearing it out
- Repair: fix the damaged area while keeping original material—splice in a dutchman to a rotted sill, or epoxy-consolidate a window sash corner
- Replace only when necessary: use compatible materials and match the original in design, texture, color, and composition as closely as possible—if a clapboard is beyond saving, mill a matching profile from similar wood species
For example, a historic wood window is often better repaired than removed. The same is true for original plaster, wood trim, and masonry details. The goal is to retain the maximum amount of authentic fabric.
Create a 3-year, 5-year, and 10-year plan
A preservation plan should be long-range, not just a to-do list. Spreading work across realistic timeframes prevents panic and allows you to budget for major expenses.
1 to 3 years
Focus on stopping deterioration:
- Fix leaks—start with the roof and flashings, then work downward
- Improve drainage—ensure grade slopes away from the foundation and downspouts discharge at least 5 feet out
- Repair gutters and downspouts—seal joints and replace rusted sections
- Stabilize failing paint or wood decay—scrape, prime, and patch to buy time until full restoration
- Address chimney or masonry issues—repoint with compatible mortar, reset loose caps
- Service major systems—have the furnace, electrical panel, and plumbing inspected and brought to safe working order
3 to 5 years
Move into deeper preservation work:
- Repoint masonry where needed—use a lime-based mortar matched to the original in color, texture, and strength
- Restore windows and weatherstripping—remove sashes, repair joints, replace broken cords, and add discreet weatherstripping
- Refinish exterior wood correctly—strip to bare wood, apply oil-based primer, and use high-quality paint or stain
- Upgrade mechanical systems carefully—run new wiring through existing chases, hide plumbing in closets or behind baseboards
- Repair plaster, porch elements, or trim—reattach loose plaster with washers, rebuild porch columns in kind
5 to 10 years
Plan for larger capital projects:
- Roof replacement or partial reroofing—use materials that match the historic appearance, such as wood shingles, slate, or standing-seam metal
- Foundation stabilization—underpin or reinforce only where necessary, and document all interventions
- Major chimney repair—rebuild from the roofline up if spalling is severe, reusing sound historic brick
- System modernization with minimal impact on historic fabric—consider high-velocity HVAC or radiant heating to avoid large ductwork
- Exterior repainting or full envelope restoration—after all water and structural issues are resolved
Balance preservation with modern safety and comfort
Older houses often need mechanical, electrical, and plumbing updates. These changes are appropriate in a preservation project when they are done sensitively and with minimal damage to historic fabric. The key is to route new systems through existing voids—between joists, inside closets, behind baseboards—rather than cutting through decorative plaster or trim.
Best practices
- Route new systems with the least visual impact—surface-mounted conduit can be hidden in corners or painted to match
- Avoid cutting historic trim or plaster unless there is no alternative—sometimes a small access panel in an inconspicuous closet is better than demolishing a wall
- Use reversible interventions when possible—screw-on panels instead of nailed, for future access
- Document any changes thoroughly—photograph every opening before it’s closed up, note wire paths and pipe locations
- Keep original materials visible and intact where feasible—don’t bury a hand-hewn beam behind drywall if it can be left exposed
If the house has lead paint, asbestos, or other legacy hazards, safety planning must come before cosmetic work. Abatement or encapsulation should be handled by certified professionals.
Know when to call a specialist
Some tasks belong in-house. Others need trained professionals. The line is usually drawn where the work affects structural integrity, water management, or the irreversible removal of historic material.
Good DIY territory
- Gutter cleaning
- Visual inspection and photo documentation
- Basic caulking review and reapplication
- Monitoring moisture and paint failure
- Clearing drainage paths and downspout extensions
Hire a professional for
- Structural movement—cracks that are active or displaced
- Chimney repair—especially above the roofline or involving flue liners
- Repointing with historic mortar—matching lime mortar requires analysis and skill
- Electrical or plumbing replacement—code compliance and safety are critical
- Roof replacement—improper flashing installation leads to leaks
- Major window restoration—involving epoxy consolidation or sill replacement
- Moisture diagnosis—using infrared cameras or moisture meters to trace hidden leaks
- Hazardous materials work—lead, asbestos, mold remediation
A useful rule: if the issue affects structure, water management, or historic material removal, get expert help.
Track everything in one system
A preservation plan fails when it lives in scattered notes and memory. Keep one shared record—a three-ring binder, a cloud folder, or a dedicated notebook—that contains:
- Inspection dates and findings
- Photos before and after repairs, with date stamps
- Contractor names, contact information, and scope of work
- Material notes—paint brand, color codes, mortar mix ratios, wood species
- Paint colors and product information—keep a painted sample or label
- Maintenance receipts and warranties
- Any permits or reports
This record becomes invaluable when planning future work, applying for grants, or explaining the house’s history to future owners. It transforms a house into a documented legacy.
Common mistakes to avoid
- Replacing repairable historic materials too quickly—original windows, for instance, can often be rebuilt for less than the cost of a high-quality replacement
- Ignoring minor leaks until they become structural problems—a small stain on a ceiling may mean rotting joists above
- Using incompatible repair products on old masonry or wood—Portland cement on soft brick traps moisture and accelerates decay
- Sealing moisture into walls with the wrong coatings—vinyl wallpaper or impermeable paint on exterior walls can cause condensation within the assembly
- Treating paint failure as only a paint issue—always investigate what’s causing the moisture or adhesion loss
- Waiting years between inspections—a lot can happen in 24 months, especially around flashings and gutters
- Starting with cosmetic projects before fixing water and drainage—painting over rot is a temporary disguise, not a solution
Long-term preservation checklist
- Identify the house’s significant features—create a written list with photos
- Photograph and document current conditions—establish a baseline for future comparison
- Inspect the building at least twice a year—spring and fall, plus after major storms
- Prioritize roof, gutters, foundation, masonry, and windows—these are the critical control points
- Repair before replacing whenever possible—preserve authenticity and original fabric
- Build a 1-, 3-, 5-, and 10-year plan—sequence work logically, from urgent to long-term
- Keep records of all work and materials—build a maintenance history
- Revisit the plan after each major repair or inspection—adjust priorities as conditions change
FAQ
How often should an old house be inspected?
At least twice a year is a strong baseline—once in early spring after the thaw reveals winter damage, and once in late autumn to prepare for cold weather. Additional checks after major storms or freeze-thaw periods are wise, because wind-driven rain and ice can create new vulnerabilities overnight.
What should be included in a preservation plan?
A preservation plan should include the house’s significant features, current condition documented with dated photographs, a prioritized list of repairs, a seasonal and annual maintenance schedule, and thorough documentation of all treatments and materials used. It’s a dynamic tool that evolves with the building.
Should original windows always be replaced?
No. In many cases, original windows can and should be repaired rather than replaced, especially if the sash, frame, and historic glass are still salvageable. Old-growth wood is remarkably durable, and with proper weatherstripping and storm panels, restored windows can perform comparably to new ones while retaining the character and craftsmanship of the house. Replacement is a last resort.
What is the most important part of old house maintenance?
Water control. Roofs, gutters, flashing, drainage, and foundation moisture should be checked first because they drive most deterioration. If you keep water out and away from the building, you prevent the vast majority of rot, masonry damage, and indoor air quality problems.
How do I decide whether to repair or replace?
Repair if the material is still largely intact and functional. Replace only when deterioration is severe enough that repair is no longer practical—for example, when wood has lost more than 30% of its cross-section or masonry units are crumbling. In those cases, use compatible materials that match the original in design, texture, color, and composition as closely as possible. The aim is to change as little as necessary while ensuring the building’s continued life.
Final thought
A long-term preservation plan is really a protection strategy for original material, time, and money. The goal is not perfection; it is steady care, smart priorities, and repairs that respect what the house already is. Every repointed joint, every saved window, every documented layer of paint is a deliberate act of stewardship that carries the building’s story forward.