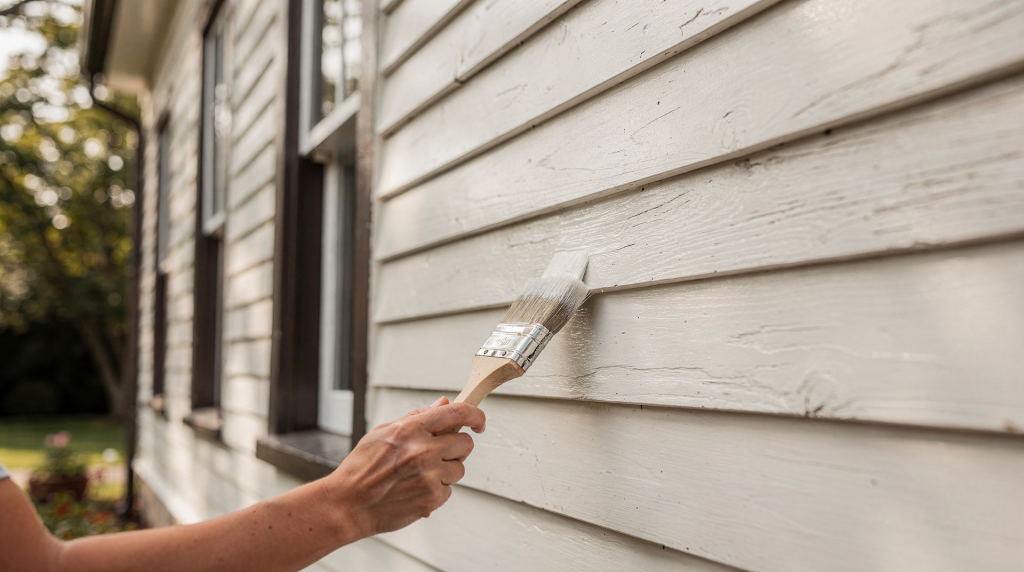
Wood siding is the face a historic house presents to the world — the first clue to its age, regional tradition, and the hands that built it. But that character survives only when moisture, paint failure, and small defects are caught early. The maintenance formula is straightforward: inspect on a rhythm, trace every problem to its source, repair rather than replace, and keep the wood protected beneath a sound paint film.
Why wood siding needs a different maintenance approach
On a historic house, siding is never just a finish layer. It belongs to the building’s original fabric — often old-growth lumber with tighter grain and greater natural durability than most modern stock. Every repair decision, then, has to serve two masters: appearance and material authenticity. In practice that means preserving existing clapboards, shingles, and trim profiles, and resisting the impulse to strip large sections at the first sign of wear.
Wood fails for predictable reasons, and they almost always trace back to water:
- Water enters through failed paint, open joints, or damaged flashing.
- Sun exposure dries and cracks surfaces, particularly on south- and west-facing elevations where ultraviolet radiation and thermal cycling are most aggressive.
- Insects and rot follow prolonged dampness — carpenter ants and termites are rarely the original cause; they are indicators of a moisture problem that came first.
- Improper cleaning or aggressive tools — wire wheels, high-pressure spray, harsh chemicals — can inflict more damage than the original defect.
What to inspect, and how often
A historic wood-sided house should be walked carefully at least twice a year, and again after heavy rain, ice storms, or any wind event that may have driven water behind trim. Pay particular attention to the elevations that take the brunt of sun and weather — on most sites, the south and west walls will show paint degradation and joint movement sooner than sheltered north walls.
Inspection checklist
- Look for peeling, cracking, or alligatoring paint — the telltale pattern of deep fissures that signals the film has lost its elasticity.
- Check for soft spots, dark staining, or a musty odor that suggests rot has already taken hold behind the surface.
- Inspect horizontal laps, vertical butt joints, and corner boards for gaps that admit wind-driven rain. On clapboards, pay close attention to the underside of each lap — water can wick upward by capillary action if the paint seal is broken.
- Examine caulk around windows, doors, and trim. Failed caulk is often the entry point for water that travels inside the wall before showing itself as peeling paint lower down.
- Watch for loose boards, lifted shingles, or split clapboards — movement means fasteners have lost their grip, often because of rust or wood decay around the nail shank.
- Look for insect activity: carpenter bee entry holes (perfectly round, about ½ inch in diameter) and termite shelter tubes on foundation walls or behind siding.
- Check gutters, downspouts, roof edges, and flashing. Siding damage frequently starts above the siding itself — a clogged gutter that spills water down the wall face, or a missing piece of step flashing at a roof-wall intersection.
The first rule: solve the moisture problem
When siding keeps failing in the same spot, the siding is rarely the root cause. Water entry from leaking gutters, failed roof edges, compromised flashing, or window leaks must be corrected before any surface repair will hold. I’ve seen paint blister near a window again and again, only to find the real culprit was a missing head flashing two stories above, channeling water behind the clapboards.
Common moisture sources include:
- Overflowing or clogged gutters that pour water down the wall.
- Leaky chimney flashing, especially at the saddle or cricket where water can pool.
- Failed window and door caulk, or deteriorated glazing putty that lets rain run behind the sash.
- Splashback from poor grading or hard surfaces that bounce water onto the lower courses of siding.
- Dense plantings — shrubs and vines that hold humidity against the wall and restrict airflow.
- Missing or damaged trim that allows water to collect behind siding, particularly at horizontal trim boards like water tables and belt courses.
A useful habit is to trace the problem upward. If paint is blistering near a window, check the window head flashing, sill slope, caulk joints, and the gutter above before touching the siding itself. Fix the water, then fix the wood.
Cleaning wood siding safely
Wood siding should be cleaned gently — not to make it look new, but to remove dirt, mildew, and grime so you can read the surface clearly. Use a mild detergent and water with a soft natural- or nylon-bristle brush, and keep pressure low. The goal is to uncover defects, not to strip history.
Safe cleaning rules
- Work in cool or mild weather when possible; hot sun can dry cleaning solutions before they rinse, leaving residue.
- Use only low pressure — a garden hose with a gentle spray nozzle, never a pressure washer.
- Rinse gently, directing water downward so it doesn’t force its way into horizontal joints.
- Avoid power washing entirely. It drives water deep into the wood, erodes soft grain, and can shatter old glass if aimed at windows.
- Do not scrub so hard that you remove sound paint or raise the wood grain. If you’re creating fuzz on the surface, you’re removing wood fiber, not dirt.
Power washing is one of the most common and costly mistakes I encounter on historic properties. It can force moisture past the paint film into the siding and sheathing, where it may take months to dry — and in the meantime, it feeds rot fungi and invites insects. The repair problem it creates is invariably larger than the dirt it was meant to remove.
Painting and repainting: what historic wood siding actually needs
On a historic home, paint is not decoration; it is a sacrificial protective coating that slows moisture entry and shields the wood from ultraviolet degradation. Most guidance points to repainting every 5 to 10 years, though the actual interval depends on exposure, coating type, and local climate. A south-facing wall in a coastal environment may need attention closer to 5 years, while a sheltered north wall under a deep eave might go 10 or more.
Signs it is time to repaint
- Bare wood is showing through worn paint.
- Paint is cracking, peeling, or flaking in sheets — a sign that adhesion has failed, often because moisture is moving through the wall.
- Joints and end grain are exposed; end grain wicks moisture far more readily than face grain, so it must stay sealed.
- The finish looks chalky or thin on sun-facing walls, where UV has broken down the binder.
- Moisture is entering around failed coating edges, visible as dark staining or localized rot.
Repainting best practices
- Remove loose paint by hand sanding or with a sharp pull scraper. Avoid heat guns on old paint that may contain lead; follow safe work protocols for lead paint if the house predates 1978.
- Prime bare wood before repainting. On historic siding, an oil-based primer often provides better adhesion and stain-blocking than water-based alternatives, but it must be compatible with the topcoat.
- Use the same type of paint system already in place when possible — oil over oil, latex over latex — to avoid adhesion conflicts. If you must switch, test a small area first.
- Paint only clean, dry surfaces. Moisture content of the wood should be below 15% before painting; a simple pin-type moisture meter is a worthwhile investment.
- Focus extra care on areas with strong sun or repeated wetting: south and west walls, window sills, and the bottom edges of clapboards where water tends to linger.
If the siding carries several thick old paint layers that obscure the crispness of the original profile, more advanced paint removal may be warranted. The goal, however, is never to strip everything automatically. It is to recover damaged detail safely — using chemical strippers or infrared tools where appropriate — and to avoid unnecessary loss of original material. Every layer of paint is also a layer of the house’s history, and complete removal is rarely justified for maintenance alone.
Repairs: fix the damaged part, not the whole wall
Historic wood siding should be repaired, not replaced, whenever the wood retains structural integrity. The preferred approach is to replace only the deteriorated section and keep the sound surrounding material in place. This preserves not just the appearance but also the original material evidence — the tool marks, nail patterns, and weathering that tell the story of the building.
Typical repair hierarchy
- Tighten loose boards with appropriate non-rusting fasteners — stainless steel or hot-dipped galvanized nails that match the original head style.
- Patch small cracks and chipped edges with a two-part exterior-grade wood consolidant or epoxy filler, which can be shaped and painted to match the surrounding profile.
- Treat small rot areas by removing all decayed wood back to sound material, then filling with a compatible wood-epoxy system. This is often far more conservation-friendly than removing an entire board.
- Replace only boards or shingles that are too damaged to save — when rot has penetrated more than half the thickness, or when the piece has split beyond the point where a dutchman or splice would hold.
When replacement is justified
- The wood is deeply rotten through most of the board.
- The piece has split beyond repair — a long vertical crack that cannot be pulled together and glued.
- Prior repairs have failed repeatedly, indicating the material itself is no longer serviceable.
- The siding has lost structural integrity — it no longer holds fasteners or resists wind loads.
- The damage affects too much material to stabilize economically, though on highly significant buildings, even extensive damage may warrant piecemeal repair rather than wholesale replacement.
When replacing historic siding, match the original profile, thickness, exposure (the amount of board revealed), and surface texture as closely as possible. A replacement clapboard that is even 1/16 inch thinner will read as a shadow line on the wall. Use the same wood species if available — old-growth heart pine, cypress, or cedar each weather and hold paint differently. A repair that looks “close enough” from a distance can still read wrong on a historic facade, and once original material is gone, it’s gone forever.
Wood rot, caulk failure, and insect damage
These three issues are often linked in a cascade: water enters through failed caulk, wets the wood, and invites insects that accelerate decay.
Rot
Rot usually begins where water lingers: lower boards near grade, window trim, corners, and areas near flashing or dense plant growth. If wood feels soft or a probe sinks in easily with little resistance, the decay has likely progressed beyond surface staining. Brown rot, the most common type, leaves wood crumbly and cubical; white rot gives a stringy, bleached appearance. Both require removing the affected wood and addressing the moisture source.
Caulk failure
Caulk is a maintenance material, not a permanent seal. It should be inspected regularly, especially on south- and west-facing joints where ultraviolet exposure causes it to harden, crack, and pull away. Failed caulk creates small openings that admit water and insects, and once water gets behind the siding, it can travel far from the entry point before showing itself. Renew caulk when it has lost adhesion or flexibility, and always tool it to shed water, not trap it.
Insects
Termites and carpenter bees should be checked for during routine inspections. Carpenter bees drill perfectly round entry holes and tunnel horizontally, weakening boards; their presence often indicates unpainted or weathered wood. Termites need moisture and soil contact, so their appearance usually signals a moisture problem or wood-to-ground contact. Pest treatment without repairing the underlying moisture issue only delays the next failure — the insects will return as long as the conditions that invited them remain.
Materials and fasteners: small choices that matter
Historic wood siding performs best when repairs respect how the wall was originally built to manage moisture. Traditional assemblies relied on lapped joints, back-ventilated shingles, and permeable paints that allowed the wall to dry to the outside. Modern materials that trap moisture — impermeable sealants, vinyl-based caulks, or non-breathing paints — can accelerate decay behind the siding.
Good practice
- Use non-rusting nails or fasteners: stainless steel or hot-dipped galvanized, sized to match the original nail head and driven to the same depth.
- Keep paint and primer compatible with the existing coating system. If the house has been painted with oil-based paint for decades, introducing a hard, impermeable latex over it can cause intercoat peeling.
- Replace only the damaged portion of a board or shingle. A scarf joint or dutchman can save most of the original piece.
- Allow the wall to dry. Never seal over wet wood, and avoid caulking the underside of clapboard laps — those gaps are part of the drainage plane.
Avoid
- Dense sealants over damp wood.
- Hard repairs that trap moisture behind the siding, such as filling large voids with cementitious products.
- Heavy coatings that obscure historic profiles — multiple thick layers of paint can blur the sharp shadow lines of original trim.
- Over-sanding that destroys edges and details, rounding over the crisp arrises that define the siding’s character.
Maintenance schedule for wood siding on a historic home
| Task | Frequency | Why it matters |
|---|---|---|
| Visual inspection | Twice a year | Catches early paint failure, gaps, and rot |
| Clean siding | About every 1–2 years | Removes grime and reveals defects |
| Check caulk and joints | Annually | Prevents water and insect entry |
| Inspect gutters, flashing, and roof edges | Annually and after storms | Stops leaks before they reach siding |
| Repaint or re-stain | About every 5–10 years, as needed | Restores moisture protection |
| Spot repair damaged boards | As soon as damage is found | Limits material loss and spreads less decay |
A practical step-by-step approach
1. Start with a full exterior walkaround
Look at the house from a distance first. Note where peeling paint, staining, or bowed boards appear — patterns often reveal the source. Then move closer and identify the exact problem area, marking it with tape if needed.
2. Find the source
Check what is above the damaged section: roof edge, gutter, flashing, window trim, or overgrown vegetation. Water travels down and sideways; the stain you see may be the exit point, not the entry point.
3. Clean gently
Wash off surface dirt so you can see the condition of the wood clearly. A dirty surface hides hairline cracks and early rot.
4. Repair the smallest soundable area
If the board is mostly sound, patch or splice it. If it is beyond saving, replace only that piece — not the whole wall. Preserve original material wherever possible.
5. Prime and repaint
Seal bare wood promptly. Do not leave freshly exposed areas unprotected, even overnight; moisture absorption begins immediately.
6. Recheck after the next rain
A repair that looks fine in dry weather may still be leaking. Walk the house after a soaking rain and look for damp spots, water trails, or new paint bubbles.
Common mistakes to avoid
- Painting over wet or dirty wood — the paint will fail within a season.
- Ignoring failed gutters or flashing — the siding will continue to deteriorate regardless of surface repairs.
- Using high-pressure washing — it forces water into the wall and erodes soft wood.
- Replacing entire wall sections when only one board is damaged — a loss of historic fabric that can rarely be justified.
- Caulking every joint so tightly that moisture cannot escape — walls need to breathe; sealing the underside of laps invites rot.
- Letting landscaping touch the siding — shrubs, mulch, and soil hold moisture against the wood and provide a highway for insects.
- Waiting until peeling paint becomes widespread before acting — early intervention is always cheaper and less invasive.
Quick checklist for homeowners
- Inspect siding twice a year
- Check gutters, flashing, and roof edges first
- Clean with mild detergent and low pressure
- Repair rot and gaps early
- Prime bare wood before painting
- Repaint before failure spreads
- Replace only what cannot be repaired
- Keep plants and soil away from the wall
FAQ
How often should historic wood siding be painted?
Usually every 5 to 10 years, but exposure, climate, and coating condition matter more than the calendar alone. A wall that faces prevailing storms may need repainting sooner; a sheltered wall under a deep eave may go longer. The best guide is the paint itself — when it begins to crack, chalk heavily, or lose adhesion, it’s time.
Can I power wash wood siding on a historic house?
No. High pressure can force water into the wood, damage the surface, and strip protective coatings. Even “soft washing” with low pressure can drive water into joints if not done carefully. Stick to a garden hose and a soft brush.
Should old siding be replaced if it is peeling?
Not usually. Peeling paint is often a maintenance issue — failed adhesion due to moisture, age, or incompatible coatings — not a reason to replace the siding. Start by checking moisture sources and repairing the failed areas. Replacement should be a last resort, reserved for wood that is structurally unsound.
What is the biggest threat to historic wood siding?
Water. Most siding problems begin with persistent moisture from leaks, failed paint, poor drainage, or trapped humidity. Control the water, and you control the deterioration.
Is it better to repair or replace damaged boards?
Repair whenever the wood is still structurally sound. Replace only the deteriorated piece when repair is no longer realistic — when rot has destroyed more than half the board’s thickness, or when the piece has split beyond the point where a sound splice can be made. The guiding principle is to retain as much original fabric as possible.
Conclusion
Maintaining wood siding on a historic home is less about dramatic restoration and more about steady, careful upkeep. If you control moisture, inspect regularly, repair small failures early, and repaint before the coating breaks down, original siding can last for decades more while preserving the character of the house. The siding is not just a shell — it’s a record of the building’s construction, its regional identity, and the craft of its makers. Keeping it sound is one of the most direct ways to honor that legacy.